Building an Indoor GIS with Reality Capture
February 11, 2025 2025-02-11 17:40Building an Indoor GIS with Reality Capture
Introduction to Reality Capture for Indoor GIS
Advancements in reality capture technologies have transformed the way spatial data is collected and managed, especially in indoor environments. Devices equipped with LiDAR and 360-degree cameras now enable highly accurate 3D mapping of indoor spaces. This article explores how reality capture data enhances indoor GIS applications, the challenges associated with its use, and the workflows that can help overcome these challenges.
Why Use Reality Capture for Indoor GIS?
Reality capture data significantly improves the accuracy and management of an indoor GIS in various scenarios, including:
- Outdated or missing floor plans – When CAD or BIM floor plans are unavailable or inaccurate, reality capture provides precise 3D models.
- As-built conditions – For renovated spaces, scanning captures the current layout, aiding in future planning and design.
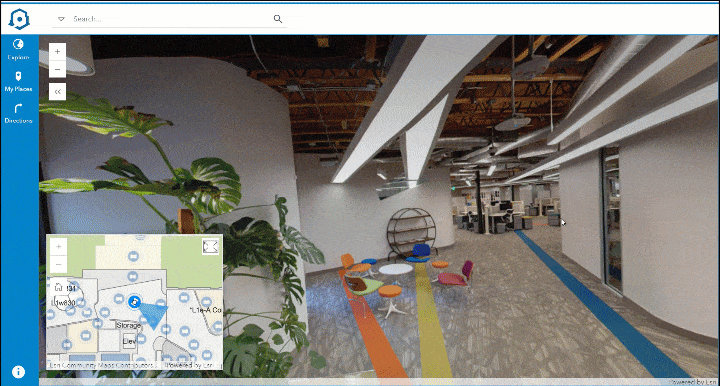
- Space reservation previews – 360-degree imagery allows users to visualize meeting rooms and equipment before booking.
- Facility management – Accurate indoor maps assist with asset tracking, maintenance planning, and space optimization.
- Emergency response planning – Up-to-date floor plans provide first responders with essential building layout information.
Overview of Reality Capture Systems
Several companies provide portable reality capture devices tailored for indoor environments. Notable systems include:
- NavVis MLX – A handheld scanner with high-accuracy LiDAR and a 360/270-degree camera, designed for hands-free operation.
- Leica BLK2GO – A compact, lightweight LiDAR scanner with wireless data transfer and hot-swappable batteries.
- FARO Orbis – A handheld system using GeoSLAM for precise point cloud capture, including a stationary scanning mode for increased accuracy.
Processing Reality Capture Data for Indoor GIS
Once reality capture data is collected, it must be processed for integration into an indoor GIS. This involves several key steps:
1. Register Scans
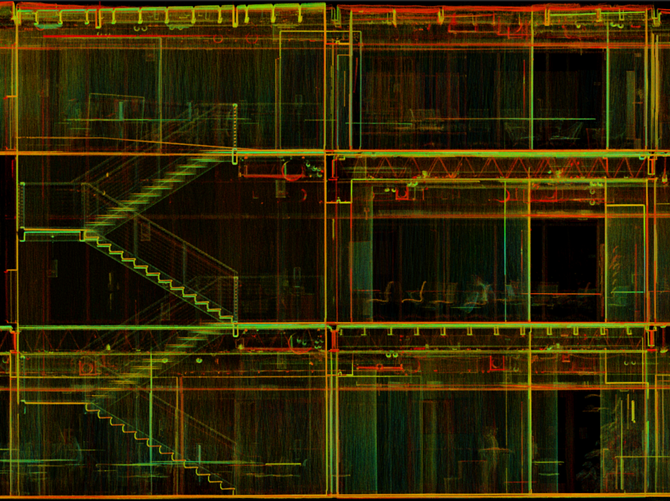
Indoor spaces often require multiple scans to capture all details. These scans must be registered (aligned) into a unified point cloud:
- Use overlapping features (e.g., stairways) to merge scans.
- Register scans floor-by-floor for easier processing.
- If control points were captured, use them for automatic alignment. Otherwise, manually match overlapping features using vendor software.
2. Georeference the Point Cloud
Aligning the point cloud with a real-world coordinate system ensures accurate spatial positioning:
- Use built-in vendor tools to assign a coordinate system.
- If GPS control points were recorded, use them for precise alignment.
- In the absence of control points, georeference the data using a satellite imagery basemap.
3. Export Processed Data
Once processed, the point cloud must be exported in formats compatible with ArcGIS Pro:
- Export point clouds in LAS or LAZ file formats.
- If 360-degree images were captured, export them in E57 format with embedded panoramic images.
- Import E57 images into ArcGIS Pro using the Import Indoor Images tool.
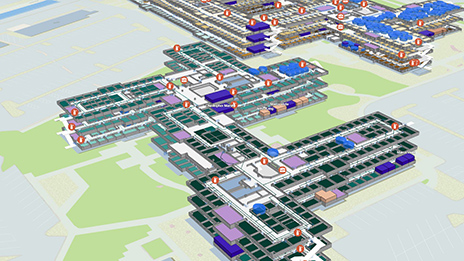
4. Generate Floor Plans from Point Clouds
After exporting the point cloud, generate floor plans within ArcGIS Pro:
- Use the Generate Floor Plan From Point Cloud tool in the Indoors toolbox to extract wall and room outlines.
Quality Assurance and Editing Workflows
After generating floor plans, a quality assurance (QA) review is crucial to ensure accuracy. Common editing tasks include:
- Closing gaps in walls – Use Create Features or Edit Vertices tools to fix missing wall segments.
- Removing unnecessary features – Delete polylines representing furniture or fixtures that should not be included.
- Refining polylines – Adjust walls using the Modify Features tools to maintain consistency and alignment.
- Aligning features – Use the Align Features tool to ensure walls are parallel and uniformly spaced.
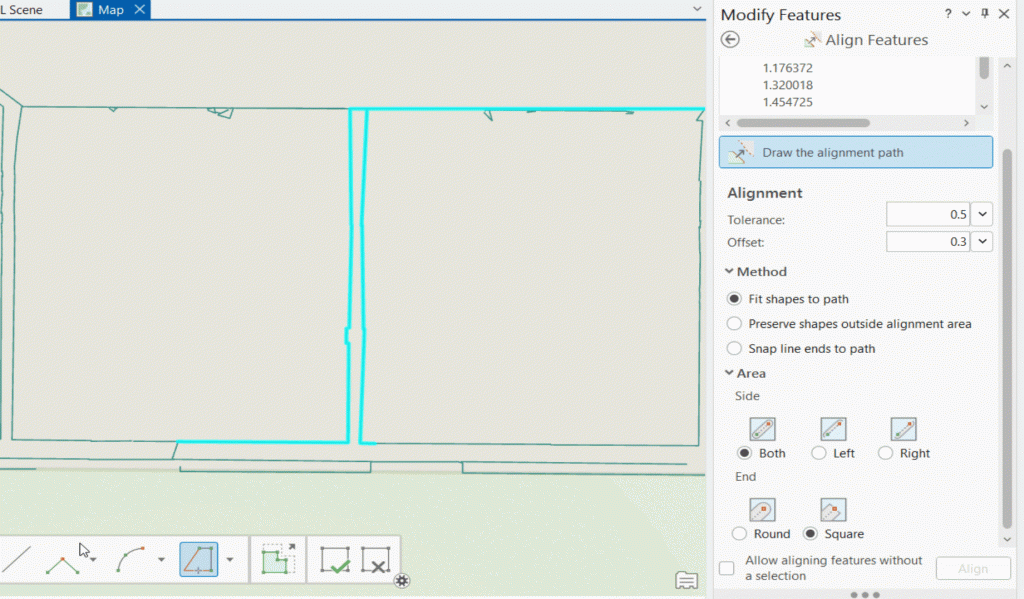
Best Practices for Editing
- Enable snapping to ensure polylines connect at vertices.
- Use a reference grid to align walls accurately.
- Cross-check floor plan dimensions with point cloud data and existing CAD/BIM drawings.
Importing Data into an Indoors Workspace
Once quality assurance is complete, import the refined data into an Indoors workspace to create a functional indoor GIS.
1. Import Polylines to an Indoors Dataset
- Use the Import Features to Indoor Dataset tool to create polygons for buildings, floors, and rooms.
- Review the output and refine features if needed.
- Add attributes such as room names and space usage details.
2. Import 360-Degree Images
- Use the Import Indoor Images tool to import panoramic photos into an Oriented Imagery layer.
- These images can be integrated into floor-aware maps within the Esri ecosystem.
Discaimer: This article was originally written by Sophie Frank and Jason Hine. View full article here